Complete Guide to All Six Luxurious Chests in Genshin Impact's Sea of Bygone Eras (2026)
Genshin Impact Sea of Bygone Eras and Luxurious Chest locations offer thrilling underwater exploration and rewarding puzzles in Fontaine's grand finale.
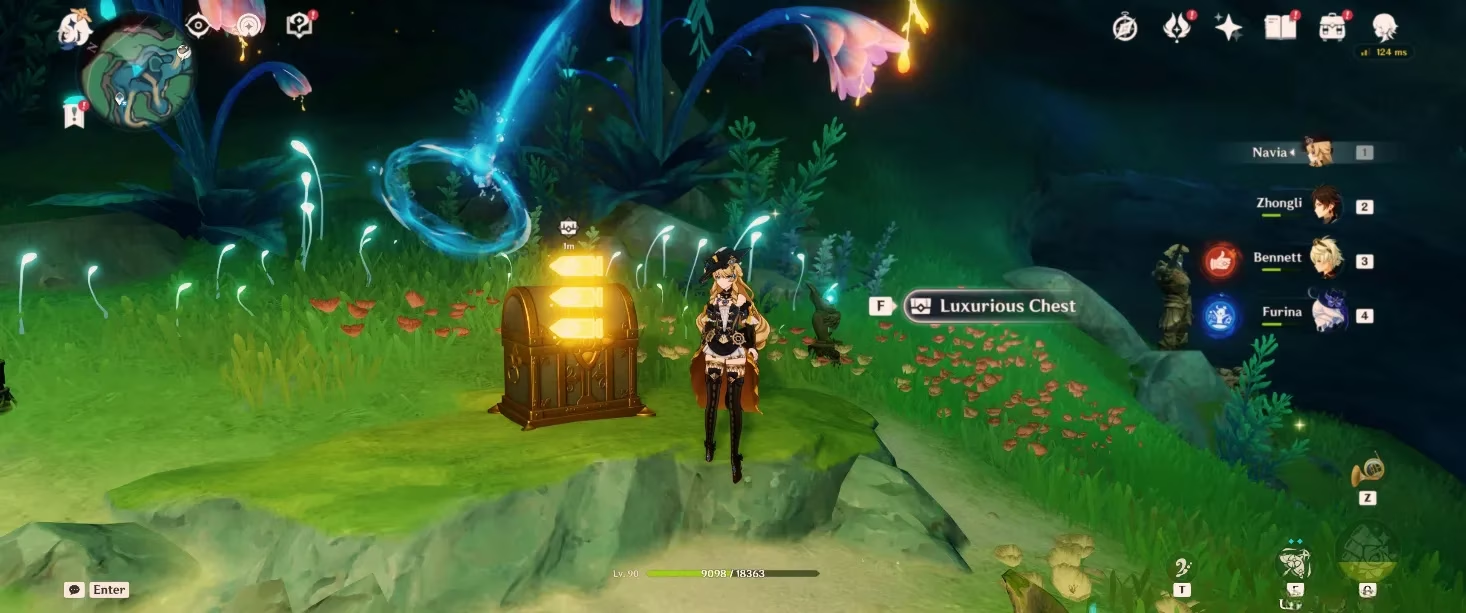
Released in version 4.6 as the grand finale to the Fontaine region, Genshin Impact's Sea of Bygone Eras captivated players with its breathtaking, predominantly underwater landscape. This final expansion introduced a host of new mechanics and submerged mysteries. For adventurers who relish deep-sea exploration, the area offers a rewarding challenge: six hidden Luxurious Chests, each secured behind environmental puzzles, combat trials, or intricate interactions. While the allure of these treasures is strong, it's highly recommended for Travelers to first complete the overarching Canticles of Harmony World Quest chain. This not only provides crucial context for the sunken realm but often unlocks necessary abilities and pathways to access these coveted rewards. Let's dive into the precise locations and methods to claim all six chests.
🗺️ Luxurious Chest Location One - Alta Semita
This chest is situated within the Alta Semita region and requires solving a multi-step environmental puzzle centered around Wonderchime flowers and Washer Octopi. The puzzle is intuitive but requires careful observation.
-
Initial Step: Begin by observing the large Wonderchime flowers. Their aura points in a specific direction, guiding your starting path.
-
First Interaction: Use the Symphony power to turn the nearby Allochromatic Anemones towards the direction of the leftmost Washer Octopi. Once aligned, interact with that octopus.
-
Shell Revelation: Proceed upwards and to the left to find a large, glowing Sea Shell. Interacting with it will reveal another Washer Octopi; tell it "Let's rock."
-
Final Rescue: The last Washer Octopi is trapped, surrounded by hostile underwater creatures. Defeat the opponents to free it, then interact with it to finally unlock the Luxurious Chest.
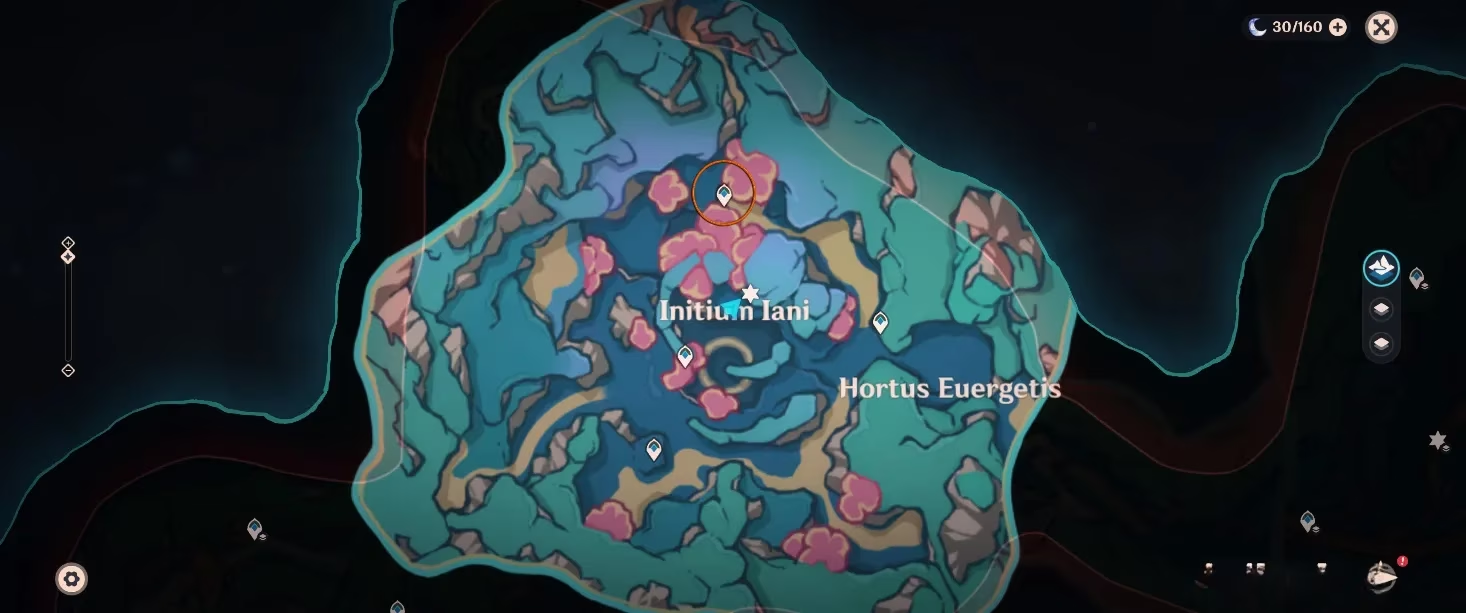
🔑 Luxurious Chest Location Two - Initium Iani
This is a conditional chest that remains hidden until you complete all local challenges. Teleport to the Initium Iani region and head towards the central area dominated by large, rolling hills.
-
Triggering the Trial: Among the large orange Clam Shells on the central hill, find one with a Washer Octopi nearby. Interacting with it initiates a time trial challenge, which becomes the main objective for the area.
-
The Objective: You must perform the "Time To Rock" interaction with three separate Washer Octopi within the time limit.
-
The first is the one that started the challenge.
-
The second is found just past the hill, often threatened by aggressive water creatures. Rescue it first.
-
The third and final Washer Octopi is perched on top of the hill.
-
-
Reward: Successfully interacting with all three rewards you not only with the primary Luxurious Chest but also with two bonus Exquisite Chests.
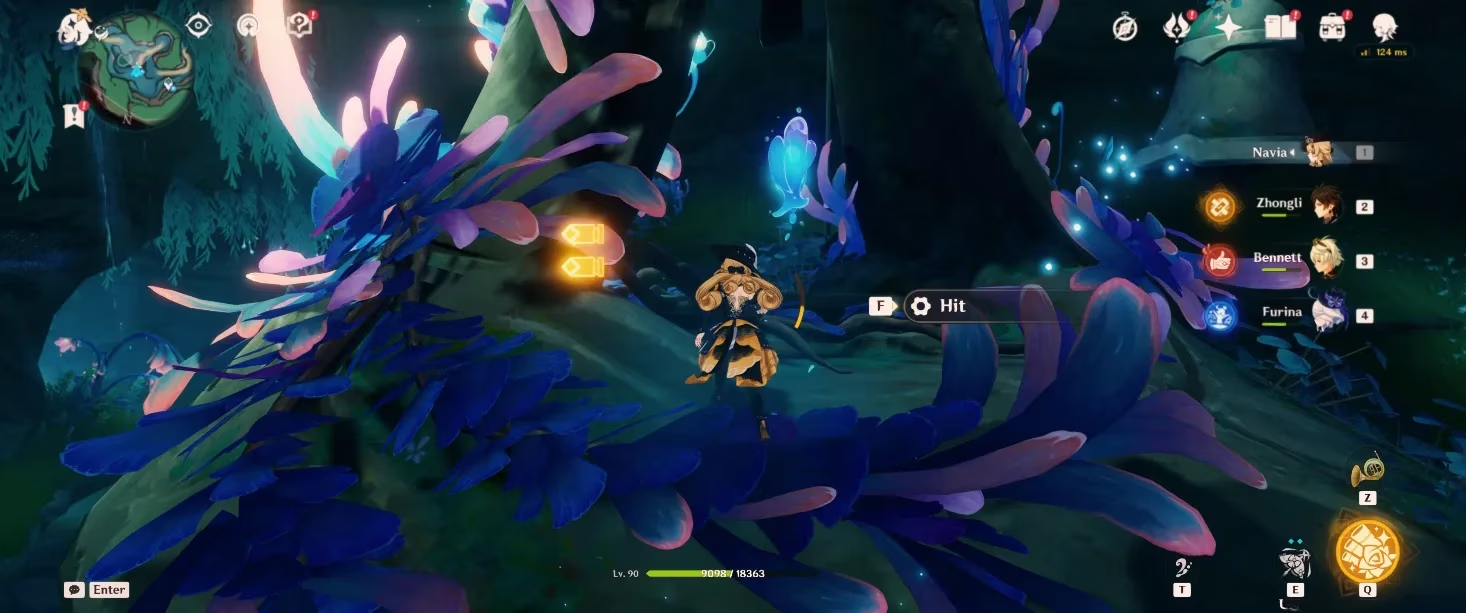
🐠 Luxurious Chest Location Three - Clivus Capitolinus
Upon teleporting to this region, immediately turn around. You will see three Wonderchime flowers with a sealed Luxurious Chest in front of them. Unlocking it requires completing a unique challenge presented by a Washer Octopi.
-
Challenge 1 - Swaying Eels: The octopus leads you to a coral reef with three "swaying eels." The goal is to pause all of them simultaneously using your Symphony power. The key is timing: activate your power the exact moment all three eels have their heads fully extended from the coral.
-
Challenge 2 - Rescue Mission: After the eel puzzle, follow the Washer Octopi further. It will guide you to a spot where two more of its kind are trapped in dense seaweed. Use your underwater combat abilities to cut the sea grass and rescue them.
-
Completion: Once all three Washer Octopi are gathered together, interact with them to unlock the chest.
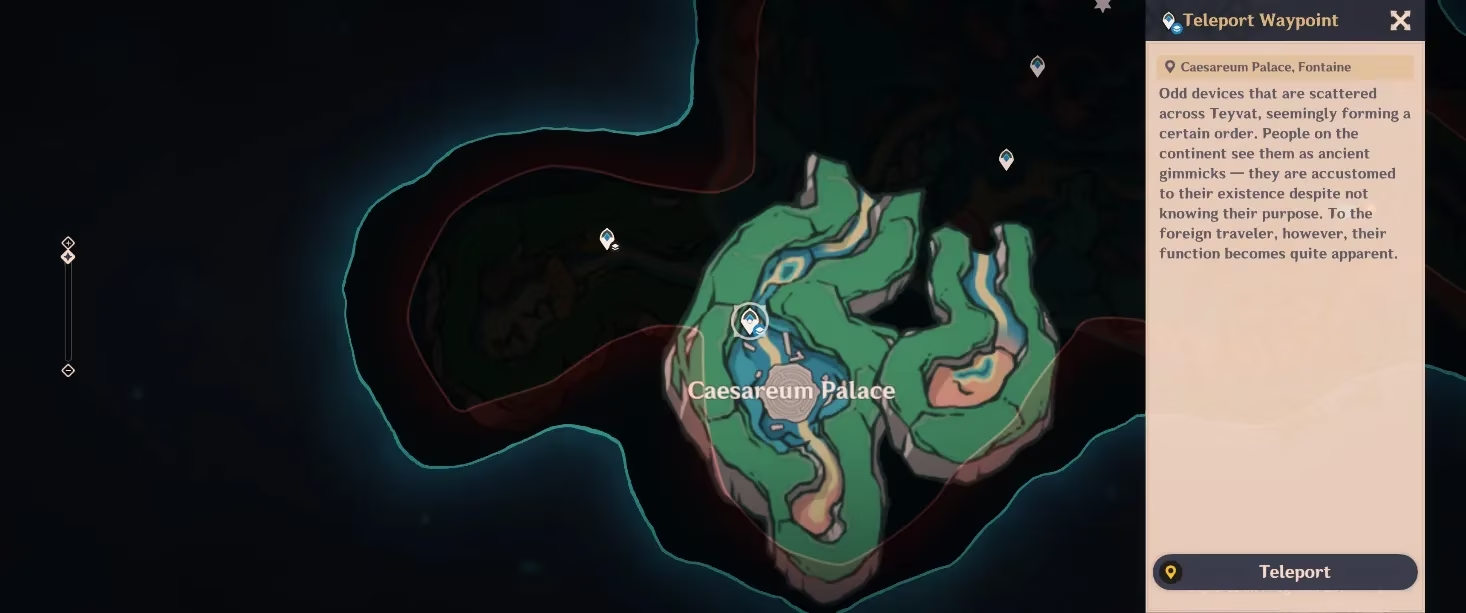
⚔️ Luxurious Chest Location Four - Caesareum Palace
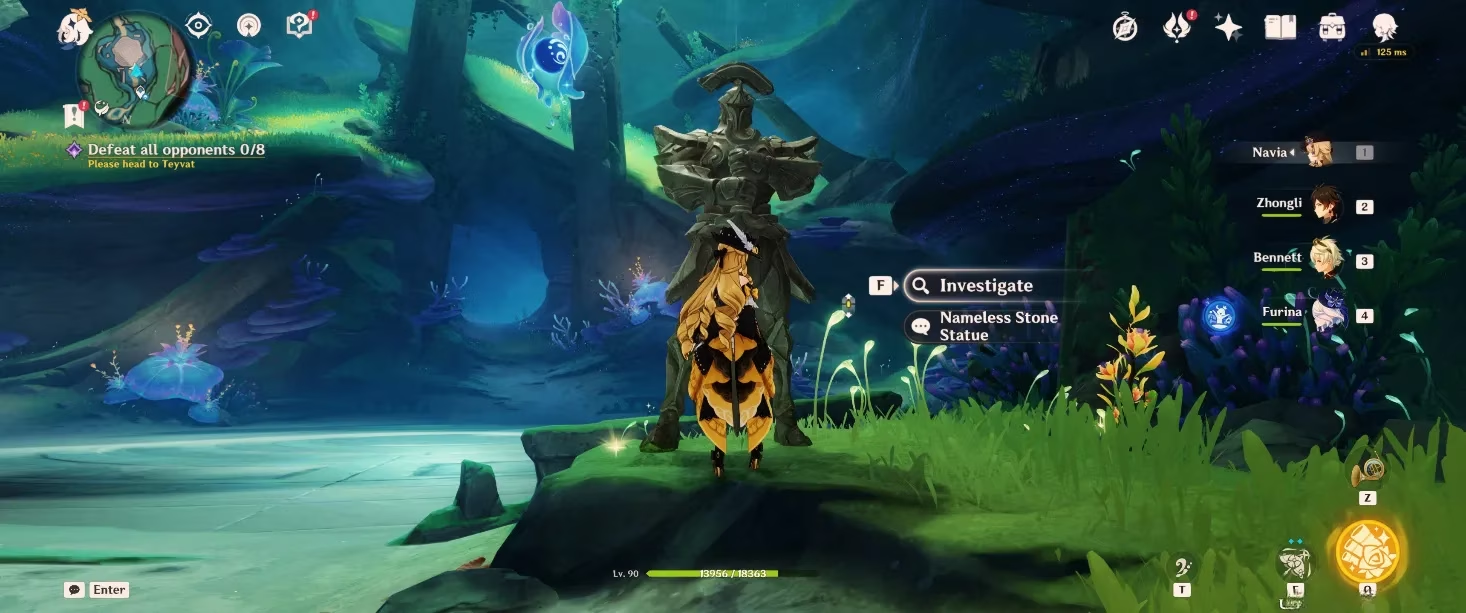
This chest offers a straightforward combat challenge for Travelers who prefer action over puzzles. After teleporting to the Caesareum Palace, you will see a Nameless Stone Statue directly in front of you.
-
Initiating Combat: Simply interact with the statue to begin the challenge. Be prepared for a sustained fight against waves of underwater foes.
-
Claiming the Prize: Upon defeating all opponents, the mystical seal on the entrance to the Caesareum Palace itself will be lifted. Swim inside the now-accessible palace to find and claim the Luxurious Chest waiting within.
🎵 Luxurious Chest Location Five - Collegium Phonascorum
This chest, though visible, can be tricky due to its multi-part unlocking mechanism. Start by teleporting to the Collegium Phonascorum waypoint and turning around; the chest will be brightly illuminated by surrounding aquatic life.
-
First Washer Octopi: Find and interact with the Washer Octopi lurking near a large metallic fish structure. It will initiate a simple challenge: defeat the nearby aggressive fish using your underwater abilities. Completing this grants an Exquisite Chest.
-
Second Washer Octopi & Path: Locate the second Washer Octopi near the opposite metallic fish. Follow it as it swims along a set path. You don't need to perform any actions here; simply staying close will cause it to automatically unlock a Wonderchime flower along the route.
-
Final Step: After the second octopus finishes its journey, several Hydro particles will spawn in the vicinity. Collect all of them, and the previously sealed Luxurious Chest will become accessible.
🔔 Luxurious Chest Location Six - The Giant Bell
The "Giant Bell" is a secret sub-area within the Sea of Bygone Eras. To find it, teleport to the northernmost waypoint in the Initium Iani region.
-
Accessing the Area: After teleporting, turn around to spot a large cave entrance. Swim inside and follow the linear path. Be sure to collect the Hydroculus and an Exquisite Chest along the way.
-
The Three Seelie Quest: Unlocking the Luxurious Chest here requires finding and guiding three Seelies to their courts.
- First Seelie: Immediately visible upon entering the Giant Bell chamber. Defeat the Stone Golems blocking it to set it in motion. A mysterious yellow bird will also appear; ensure you are in contact with both the Seelie and the bird as you follow them. Use Hydro abilities or currents to ascend to the top of the giant bell. Approach the bell closely to "hit" and ring it, causing a yellow radiance to guide the Seelie home.
-
Second Seelie: After the first Seelie is secured, jump down to its resting place to begin searching for the next one.
-
Third Seelie: Use Elemental Sight at the Seelie court to reveal a directional hint. Follow the path to find the final Seelie, which is guarded by multiple waves of Anemo Slimes. These slimes are fragile and will explode instantly upon being hit by any skill, making the combat trivial. Guide this last Seelie back to its court.
-
Grand Reward: Once all three Seelies are returned, a brief cutscene will play, and the magnificent Luxurious Chest beside the Giant Bell will unlock, offering a fittingly grand reward for your thorough exploration.
In summary, the Sea of Bygone Eras stands as a testament to Genshin Impact's evolving world design, blending exploration, puzzle-solving, and combat into a cohesive underwater adventure. Securing all six Luxurious Chests is a journey through the heart of this sunken empire, rewarding diligent Travelers with precious resources and the satisfaction of uncovering every secret the depths have to offer in 2026. 🏆
Comments