
A Traveler's Guide to Every Lampylumen Ore Location
Lampylumen ore locations in Tiger's Maw Mine: find clusters, solve quests, and maximize daily mining for Originite Weapon Supply rewards.
Long before the sun climbed over the cliffs of Tiger's Maw Mine, a lone traveler checked the teleport beacon and studied the dark tunnels ahead. Lampylumen ore was the goal—a pale, glowing mineral used as currency at Shilang's Ore store. With eighty pieces, an explorer could buy a four-star Weapon Selector Box from the Originite Weapon Supply Chest, so the daily hunt was worth the trouble. The mine could not be fully explored until the Hidden Dangers in Peaceful Life quest from the Tiger's Maw Exploration line was completed, but most ore nodes were available right away. Early surveys counted as many as 49 Lampylumen ores across the surface, underground, and nearby caves, and the nodes returned every day with the reset.

💠 Surface Clusters Near the Teleport Beacon
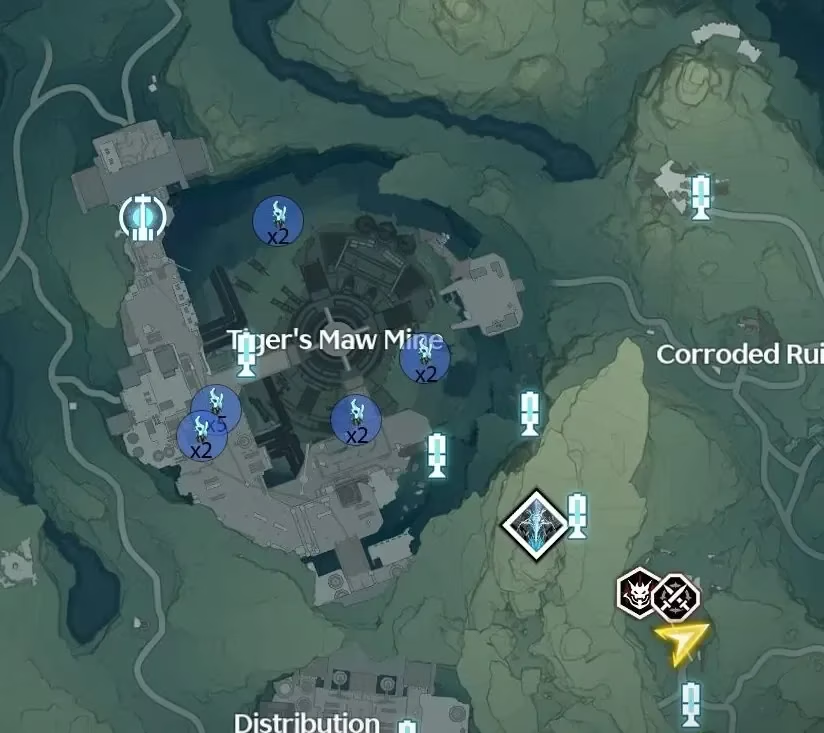
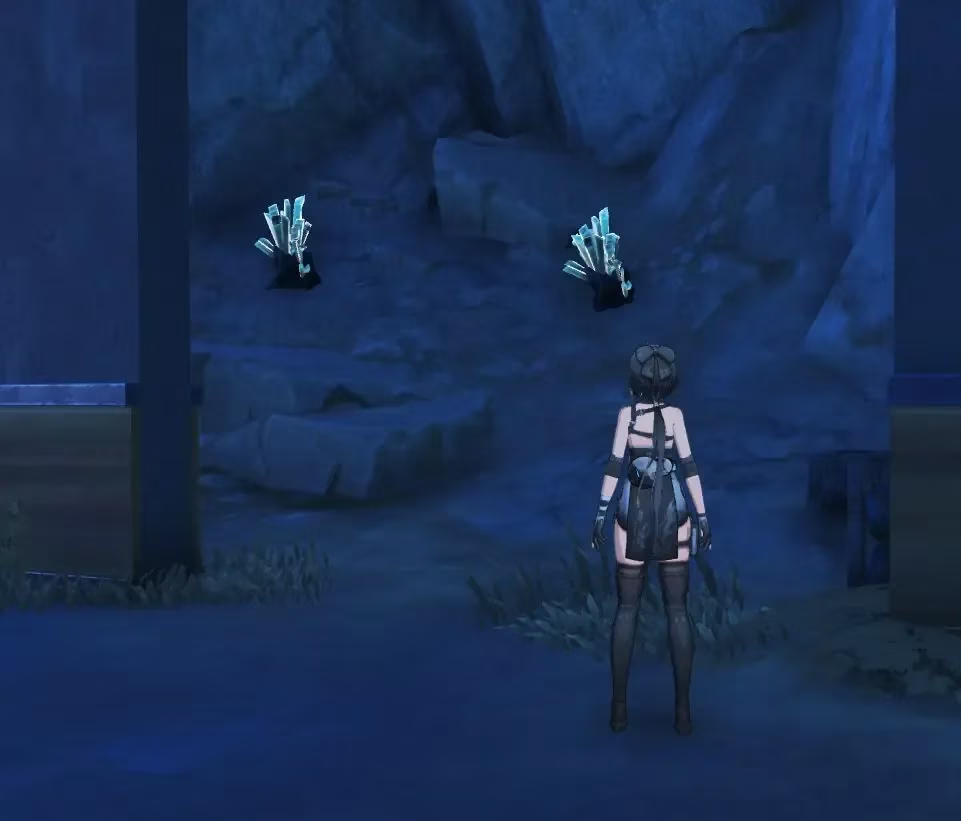
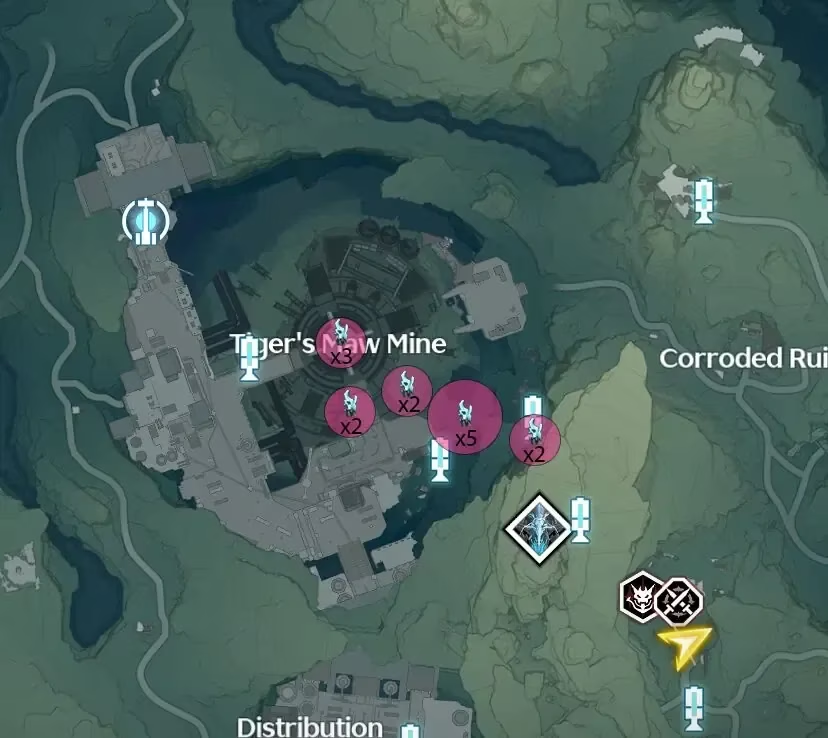
The bottom of the mine held the most convenient loop. Around the teleport beacon, five visible ores formed a quick starting cluster. A single extra ore sat behind the beacon on top of a rock, easy to miss if the traveler rushed forward. In front of the beacon, a stone bridge stretched over the open shaft, and three Lampylumen ores rested in its middle section. A grapple hook or a short wall-run made that pickup simple. Behind the bridge, two more ores jutted from a rocky shelf on the wall.
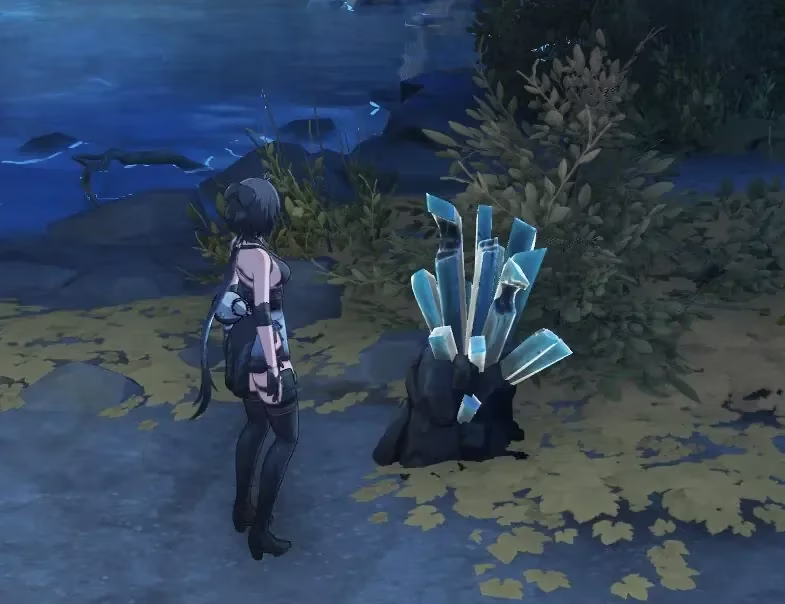
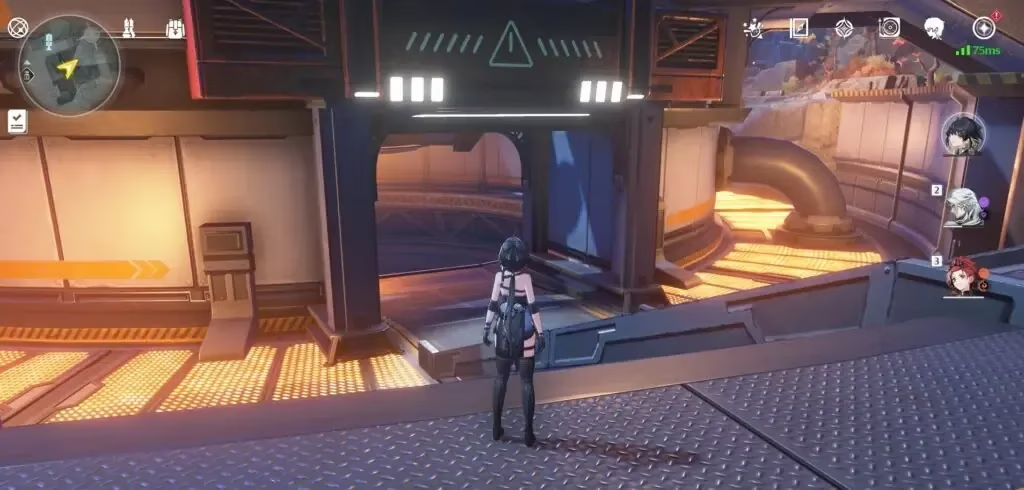
Two additional ores were locked behind a sealed door near the beacon, just beyond the group of five. The door opened only after the traveler completed The Fabled Magnetic Cube Mechanics. That quest arrived in three parts, and after clearing one part, the traveler had to wait twenty-four hours before the next would appear. Because of that delay, starting the quest early saved time later.
🚇 The Subway Cave Above the Mine
Further along the marked surface route, a narrow path climbed the mountain. The traveler followed the trail upward until it ended at a cave mouth, where a subway tunnel ran cold and quiet. Only two Lampylumen ores were hidden in this area. One sat on the left just after entering, and the other waited near the escalator. The cave was short, but the detour added two easy pieces to the daily route.
🪨 The Underground Path to Lampylumen Myriad
To reach the underground section, the traveler went to the bottom of the mine and looked at the side of the tower. A right turn, then a left, revealed a descending entrance. From there, the path was mostly linear. The traveler moved deeper through the rock, passing a few ore clusters along the way, until the tunnel opened near the Lampylumen Myriad. This route was ideal for a quick sweep before or after a boss run.
🌊 The River Cave and the Nine-Ore Chamber
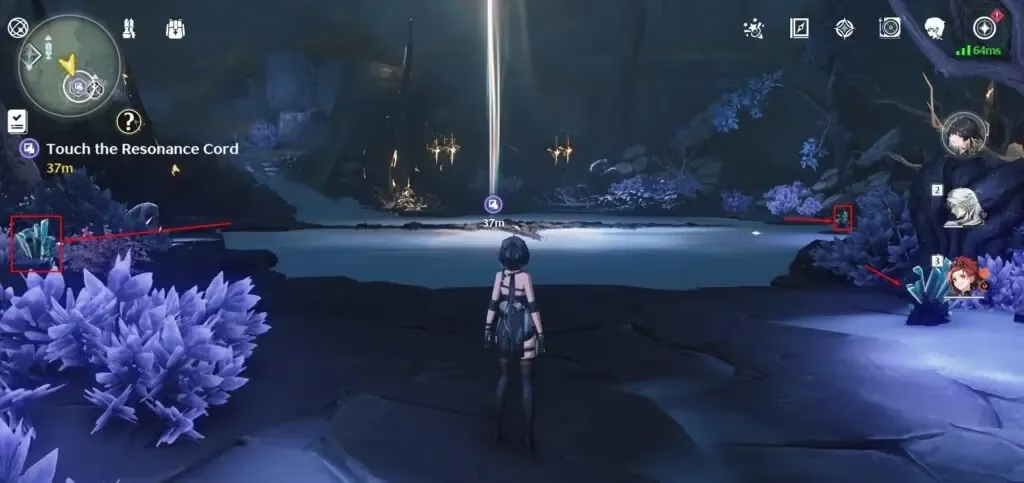
One of the more puzzling caves could be entered in two ways. The traveler could climb uphill and follow the river to its end, or cut through the subway section from the surface. Either route opened into a deep chamber where nine Lampylumen ores were spread through the dark. Four sat at the bottom, three were scattered around the TD Field, and one waited at the end of the cave after taking the left-hand path shown by the glowing rock walls.
🔐 Between Donglo Research Station and Tiger's Maw Mine
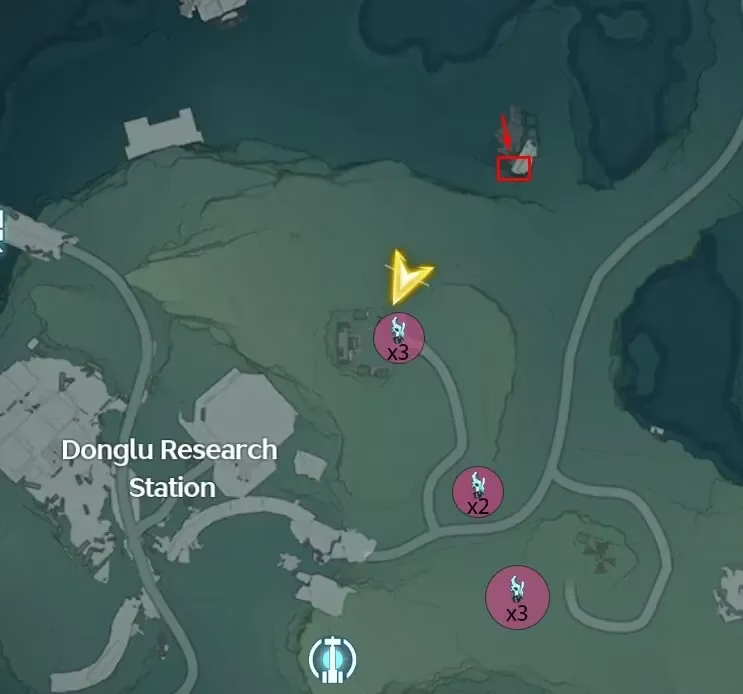
Northeast of Donglo Research Station, a narrow entrance opened into another cave that required no side quests. The traveler fought a few Tacet Discords at the mouth and moved inside. The tunnel was linear, and three strong opponents—level 70 Diamondbacks—waited near the end. They could be ignored while the traveler grabbed the ore and slipped toward the exit. A sealed door with a panel on the right asked for a four-digit password. The correct sequence was 2-4-5-7, and wrong attempts carried no penalty, so even a forgetful traveler could try again without fear.
⛏️ Turning Ore into a Four-Star Weapon
After gathering eighty Lampylumen ores, the traveler returned to Shilang at Tiger's Maw Mine and received the four-star Weapon Selector Box. Even in 2026, the daily reset made the loop repeatable, so even a relaxed explorer could stockpile enough ore after a few visits. The most efficient order was to sweep the surface, unlock the subway and underground chambers, clear the river cave, and then end at the Donglo Research Station side cave.
| Area | Notable Ore Pockets | Requirement |
|---|---|---|
| Tiger's Maw Mine surface | 5 near the beacon, 1 behind it, 3 on the bridge, 2 behind the bridge, 2 locked | Complete Hidden Dangers in Peaceful Life for full access |
| Locked door | 2 ores | Complete The Fabled Magnetic Cube Mechanics |
| Subway cave | 2 ores | None |
| Underground path | A few ores on the way to Lampylumen Myriad | None |
| River cave | 9 ores in the deepest chamber | None |
| Donglo side cave | Ore near the password door and beyond | Password 2-4-5-7 |
A smooth daily loop looked like this:
-
Sweep the surface clusters around the teleport beacon.
-
Unlock the sealed door and check the subway cave.
-
Descend through the underground path toward the Lampylumen Myriad.
-
Clear the river cave and collect the nine deep ores.
-
Finish at the Donglo Research Station side cave.
With the route memorized, the traveler no longer wandered in circles. Each glowing chunk felt like progress, and the daily reset turned the hunt into a steady climb toward a stronger arsenal.
Comments